Prospector U. is a series of training videos to get you up to speed fast with Prospector.
From the essential basics up through advanced topics you'll learn everything you need to
know to be productive with the software.
Easy to Learn, Easy to Use DOES NOT MEAN Dumbed Down
Often times when a software application is represented as easy to use,
one might infer that the program is dumbed-down version of a
full featured program. Kind of like what Microsoft Word Pad is to Microsoft Word. Nothing of the sort applies to Prospector.
Just because we have carefully crafted an easy to learn and
easy to use interface does not mean that we have purposely omitted
features or options to avoid complexity. You can always access all the
parameters of any program you wish to create:
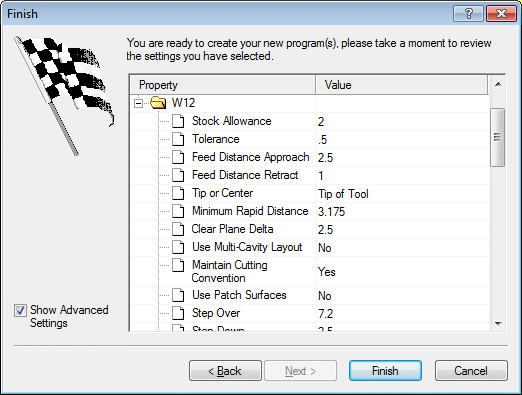
Have a ball! You can go as deep into weeds as you want to tweak any of
the 50+ parameters for just this Z-Planar program.
The point is that it is not necessary to expose this kind of complexity to a user. Skill-based systems require users
to learn all the arcane settings in the program to know what they do and how they can affect the results.
Becoming proficient with any of these skill-based systems takes a long time. Time is money. It's
expensive to train new people on these types of systems.
Think about this...
How many times have you seen a help-wanted ad where the
qualifications include "Must know Mastercam" or "Must know PowerMill" or
"Must know (fill in the blank)"? Why is that? That's because these are skill-based applications
that require lots of training and loads of actual time using
the software to become proficient with it. We believe we've found
a better way for mold makers to get out of this trap and start hiring
people based on more important attributes than what software they know.
Easy to Learn, Easy to Use
Making the Seemingly Complex Simple
Prospector makes extensive use of standard features afforded by the Microsoft Windows® user interface to implement wizards. Wizards
guide users in a step-by-step process through operations. At every step, Prospector’s built-in tool making know-how embedded
in the knowledge base will automatically suggest solutions that represent your preferences and shop rules.
For example, making a new 3D program requires just 2 steps; the
other 4 are optional. Have a look:
Step 1 - Choose Where to Machine
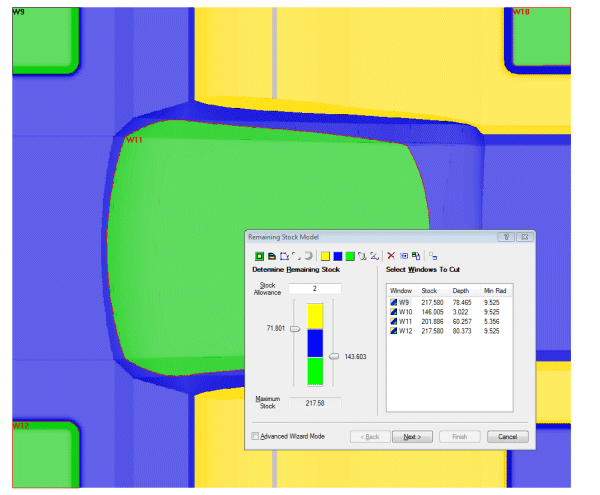
With the assistance of the RSM view of the current state of the stock, simply choose area(s) of interest to be machined. The areas
you choose are shown in a convenient grid control and displayed in the 3D view of the part and the RSM view.
Step 2 - Choose the Most Appropriate Machining Strategy
The data about the size and location of the areas to machine, remaining stock and part characteristics are all fed as input to the
PowerSource
engine to be processed with your rules to suggest how these areas should be machined given the current conditions. The result is the
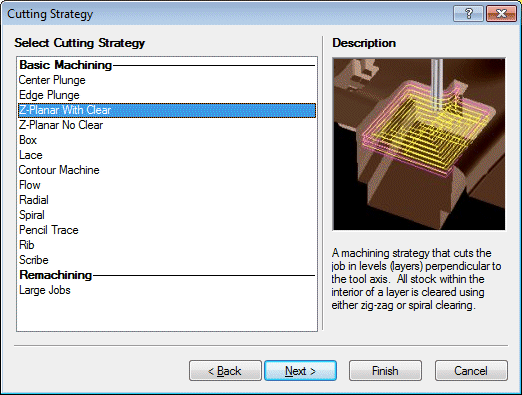
automatic selection of a machining strategy that appears to be the most appropriate:
PowerSource engine has computed that Z-Planar With Clear is the most appropriate strategy to use given the
current conditions. Of course you can countermand this recommendation and choose any strategy you wish.
Note that the Finish button on the new 3D program wizard is now enabled. The PowerSource knowledge-base engine has computed the proper tool,
feeds, speeds, step-over, step-down for this Z-Planar program. In short, all program parameters are set so if you wish, just click Finish and
you're done. That wasn't complicated now was it?
Step 3 (Optional) - Choose the Right Tool for the Job
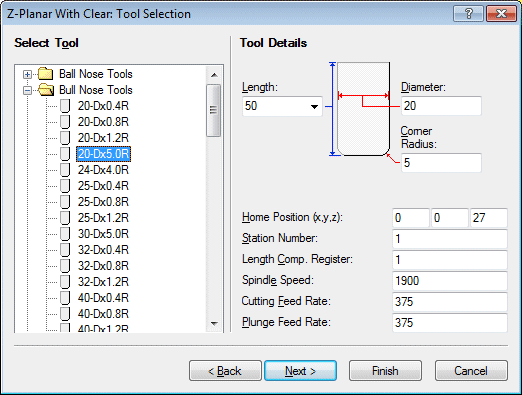
As you step through the wizard, each page contains key elements of the program(s) to be generated. The tooling
page shows the tool chosen by your rules and standards along with the associated feedrate and spindle speed that makes
sense for the material type and machining conditions. You can of course choose a different tool type or size and/or alter
any of the associated tooling parameters.
The PowerSource engine has run the rule set for tool selection for Z-Planar With Clear and has come up with a recommended
tool. Of course you are free to choose a different tool if you wish. The criteria for selecting a
preferred tool is programmed in your
PowerSource database.
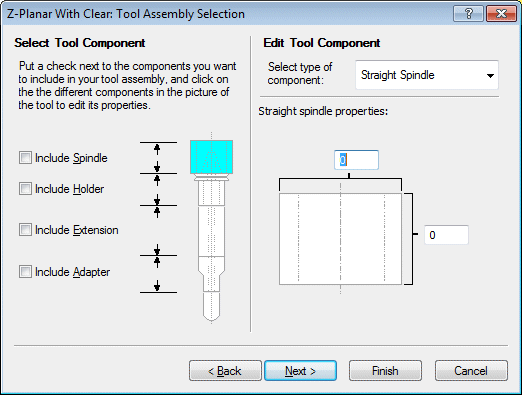
Step 4 (Optional) - Add a Tool Assembly
Model the entire tool assembly you wish to use. This is an important step in order to allow Prospector to check
if there will be a collision with the part or stock.
Just like your tools, tool assembly components can be predefined and stored in your PowerSource tooling database to
make modeling an assembly a simple task.
Step 5 (Optional) - Setting Optimal Program Parameters
The parameters page of the wizard details specific parameters related to the machining strategy chosen. PowerSource has automatically set the program
parameters according to your rules and preferences.
PowerSource has automatically calculated the start and end Z for each area to be machined based on the
current stock condition and the stock allowance.
Creating any program follows this same philosophy. A new program wizard will always walk you through the process of make a program. That
means you won't be able skip a step or inadvertently miss establishing an important parameter
This simplicity of design of the user coupled with PowerSource technology means that we can train new users who may have never even touched a
computer before in 3 days or less. That's what we mean when we say Prospector is the only NC programming system designed from the start for
shop floor programming.